
Think cotton swabs are safe for cleaning your dog’s ears? They’re not.
Cleaning ears at home can stop itch, bad smells, and simple infections when you do it gently and correctly.
This post gives easy, vet-approved steps you can use right away, what supplies to grab, how deep to clean (no deeper than one knuckle), what to watch for, and when to stop and call the vet.
By the end you’ll have a calm, low-risk routine for healthy ears.
Essential At-Home Dog Ear Cleaning Steps for Immediate Use
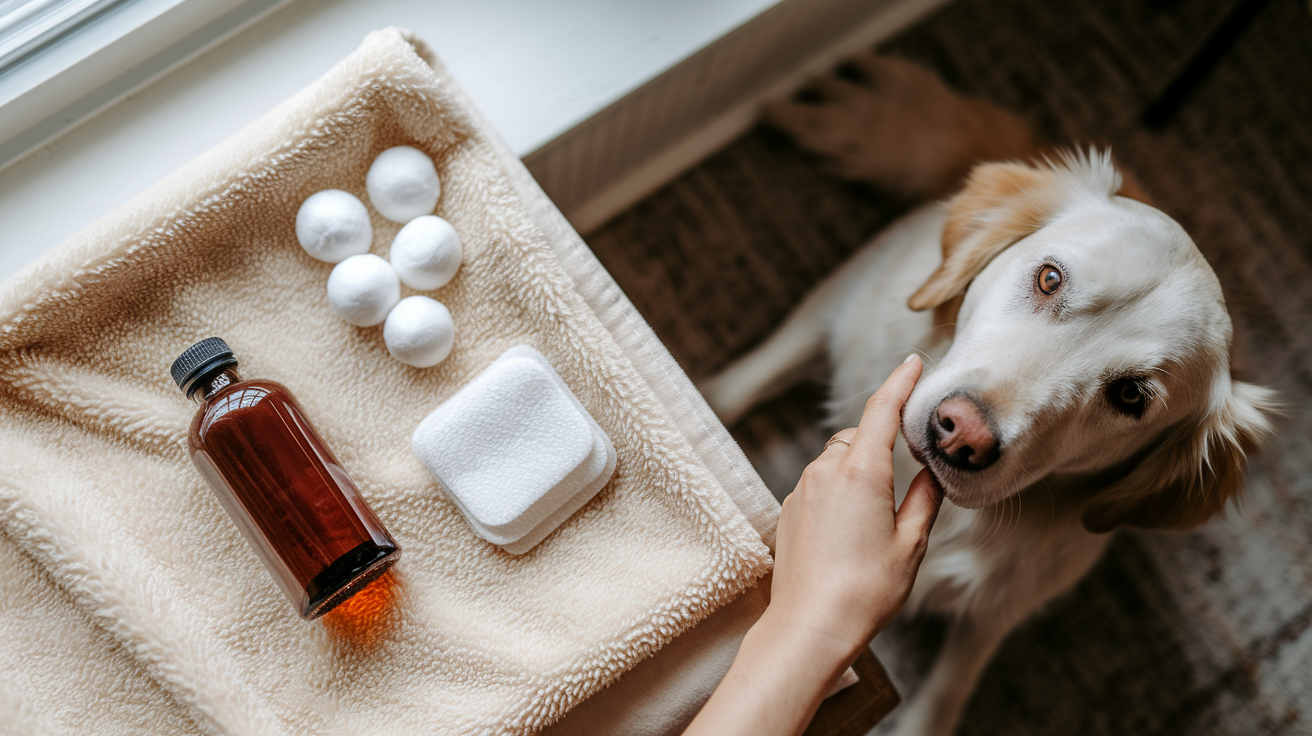
Before you start, get everything ready and pick a calm space. Choose a room where your dog already feels comfortable, lay a towel on the floor to catch drips, and make sure the lighting’s good enough to see inside the ear. You’ll need a vet-approved ear cleaning solution, cotton balls or gauze pads (rip each ball in half so it’s easier to wrap around your finger), and a towel for your lap. Try to pick a moment when your dog’s already relaxed or sleepy. Right before bed works great for a lot of families.
Once your dog’s lying on their side, gently lift the ear flap straight up to straighten out the canal. Pour enough cleaning solution directly into the ear opening until you see liquid pooling at the top of the canal. Don’t worry, you can’t overfill an L-shaped canal. Pinch the ear closed to keep the fluid in, then massage the base of the ear, just below the opening, with your thumb and forefinger for at least 30 seconds. You’ll hear a squishy or swishing sound as the cleanser breaks up wax and debris inside.
Now let go of the ear flap and step back. Your dog’s going to shake their head hard to throw out the loosened fluid and debris. This is good. It brings everything closer to the opening where you can safely reach it.
Once the shaking stops, wrap a half-ball of cotton or a small gauze square around your pinky finger. Gently wipe debris from the ear opening and as far inside the canal as your pinky can comfortably reach, but never deeper than one knuckle. Use fresh cotton for each wipe, cleaning all the ridges and crevices you can reach. The pinky finger’s smaller, gentler, and safer than your index finger for this job.
Here are the five steps in simple order:
- Fill the ear canal with cleaning solution until you see liquid at the opening.
- Pinch the ear closed and massage the base gently for 30 seconds.
- Release and let your dog shake their head.
- Wrap a piece of cotton around your pinky and wipe debris no deeper than one knuckle.
- Repeat the filling, massaging, and wiping until the cotton comes out clean.
Dog Ear Anatomy Basics to Support Safe Cleaning at Home
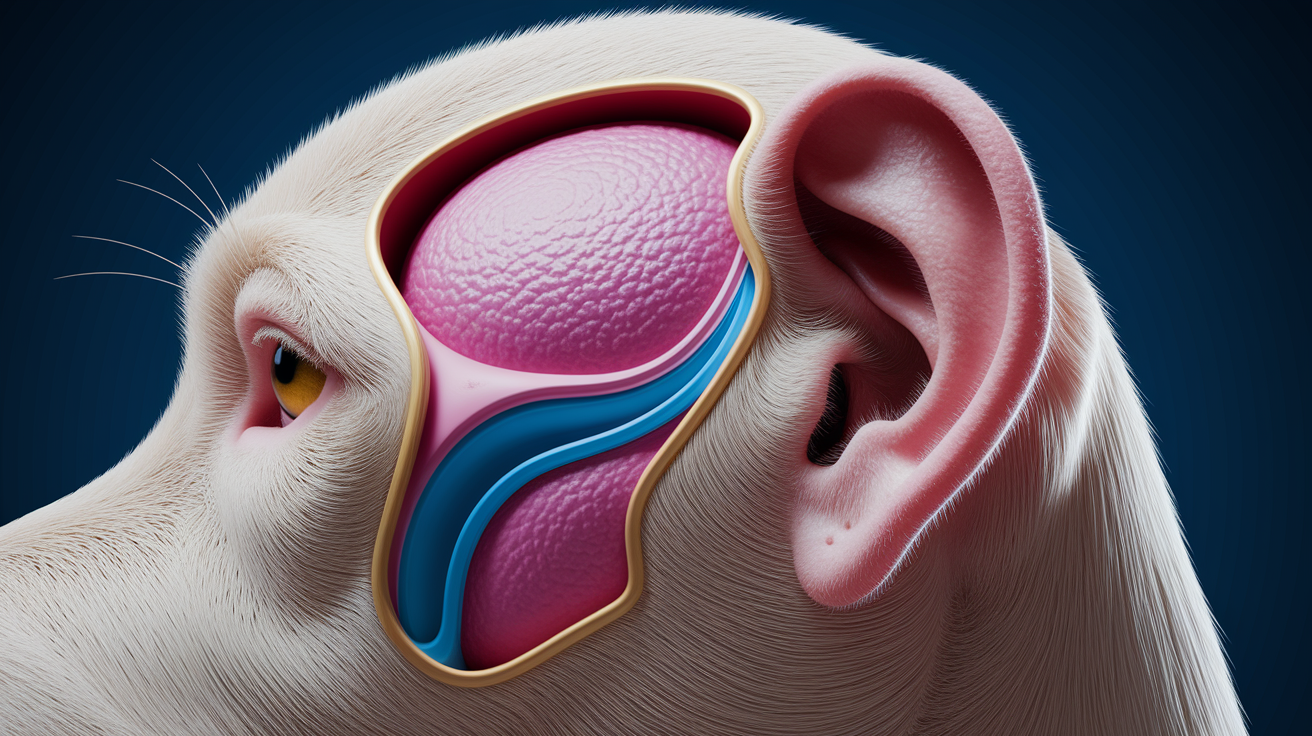
A dog’s ear canal is shaped like the letter “L.” It starts with a vertical section that drops down from the ear opening, then makes a sharp 90-degree turn inward toward the side of the head. The eardrum sits beyond that horizontal bend, tucked safely out of reach when you clean gently with a fingertip.
This L-shape is a natural safeguard. It means you can’t accidentally touch the eardrum during routine home cleaning as long as you stay shallow and gentle. You’re only cleaning the vertical portion and the top curve of the canal. That’s why cotton swabs are dangerous. They’re long enough to push debris past the bend and risk damaging tissue or packing wax deeper where it can trap moisture and create infection.
| Part of Ear | Purpose |
|---|---|
| Outer ear (ear flap and opening) | Funnels sound inward and helps protect the canal from dirt and large debris. |
| Vertical and horizontal ear canal (L-shaped) | Carries sound to the eardrum; traps wax and debris before they reach the eardrum. |
| Eardrum (at the end of the L-curve) | Vibrates in response to sound waves; separates the outer ear from the delicate inner ear structures. |
Never insert anything rigid, pointed, or longer than your pinky’s first knuckle. The safe depth limit for home cleaning is about ½ inch (roughly 12 to 13 millimeters), which matches the first joint of an average adult pinky finger wrapped in soft cotton.
Dog Ear Cleaning Supplies and Safe Ear Solutions for Home Use
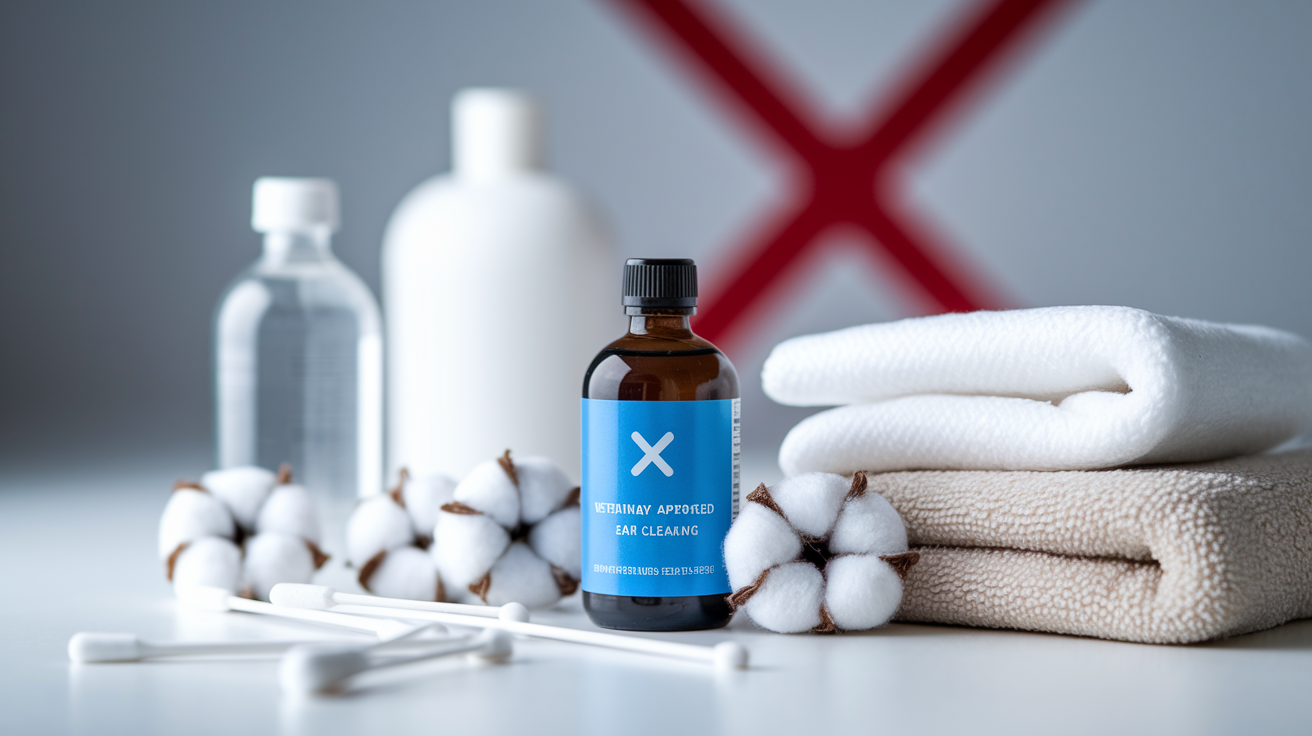
The most important supply is a vet-approved dog ear cleaning solution. Look for a general-purpose, non-medicated formula designed to dissolve wax and dry the canal safely. Don’t use products that contain alcohol, hydrogen peroxide, or other harsh antiseptics unless a veterinarian’s prescribed them for a specific infection. Alcohol burns inflamed tissue, and hydrogen peroxide can damage healthy cells and worsen irritation over time.
You’ll also need clean cotton balls or sterile gauze pads (tear each cotton ball in half before you start so it wraps neatly around your fingertip), a soft towel to catch drips and protect yourself from the head shake, and optionally a pair of disposable gloves if your dog’s ears are especially waxy or if you’d rather not touch debris directly.
Here’s what to keep on hand and what to skip:
Use: Vet-approved ear cleaning solution, cotton balls or gauze pads, a soft towel for drips.
Optional: Disposable gloves, a helper to gently hold your dog steady.
Avoid: Q-Tips or cotton swabs (they push debris deeper and can injure tissue), alcohol wipes (too harsh for ear canal skin), syringes (pressure can damage the eardrum), hydrogen peroxide (irritates and inflames), and any homemade recipe on an inflamed, painful, or infected ear.
Homemade option for weekly maintenance only: A mild vinegar rinse. Mix ⅓ cup apple cider vinegar (2% to 2.5% acetic acid) with ⅔ cup lukewarm water and flush 1 to 5 milliliters per ear using a dropper. Use this only on healthy, non-inflamed ears and never if you see redness, pus, or smell a strong odor.
For visible waxy buildup (not for inflamed ears): Warm about ½ teaspoon of food-grade almond oil by placing the small cup in a bowl of hot water (don’t let water overflow into the oil). Drop the warmed oil into the ear, let it run for about 5 seconds, massage gently, and wipe excess with soft cotton. This softens stubborn wax but shouldn’t replace professional care if infection’s suspected.
When in doubt, stick with a commercial product labeled for dogs and skip the DIY route if your dog’s ears look red, smell bad, or show any signs of discomfort.
Signs Your Dog’s Ears Need Cleaning and When to Stop
Healthy ears are pale pink inside, have little to no odor, and show only a small amount of light-colored wax. If you notice visible buildup of dark brown or yellowish wax, a musty or yeasty smell, or your dog scratching at the ear or shaking their head more than usual, it’s time for a gentle cleaning. Light debris and minor wax accumulation are normal, especially after a bath, a swim, or a dusty walk, and respond well to routine home care.
But some symptoms are red flags that mean “stop and call the vet instead of cleaning at home.” If you see any of the following, skip the home cleaning and book an appointment:
Redness or swelling inside the ear canal or on the ear flap.
Thick, discolored discharge that looks like pus (white, yellow, or green).
Blood in the ear or on your cotton ball.
Severe, foul odor that doesn’t fade after a single gentle wipe.
Intense pain. Your dog yelps, pulls away hard, or won’t let you touch the ear at all.
Symptoms that return within a day or two after you clean. That’s a sign of an active infection or underlying issue.
Visible inflammation. Hot, puffy, or crusty skin around the ear opening.
Long-eared breeds like Cocker Spaniels and Basset Hounds, as well as dogs that swim often, are more likely to develop ear problems because their ear flaps trap moisture and limit airflow. Check these dogs’ ears more frequently, and if you’re ever unsure whether what you’re seeing is normal wax or the start of an infection, go with a quick vet check rather than aggressive home cleaning.
Safety Precautions and What NOT to Do When Cleaning Dog Ears at Home
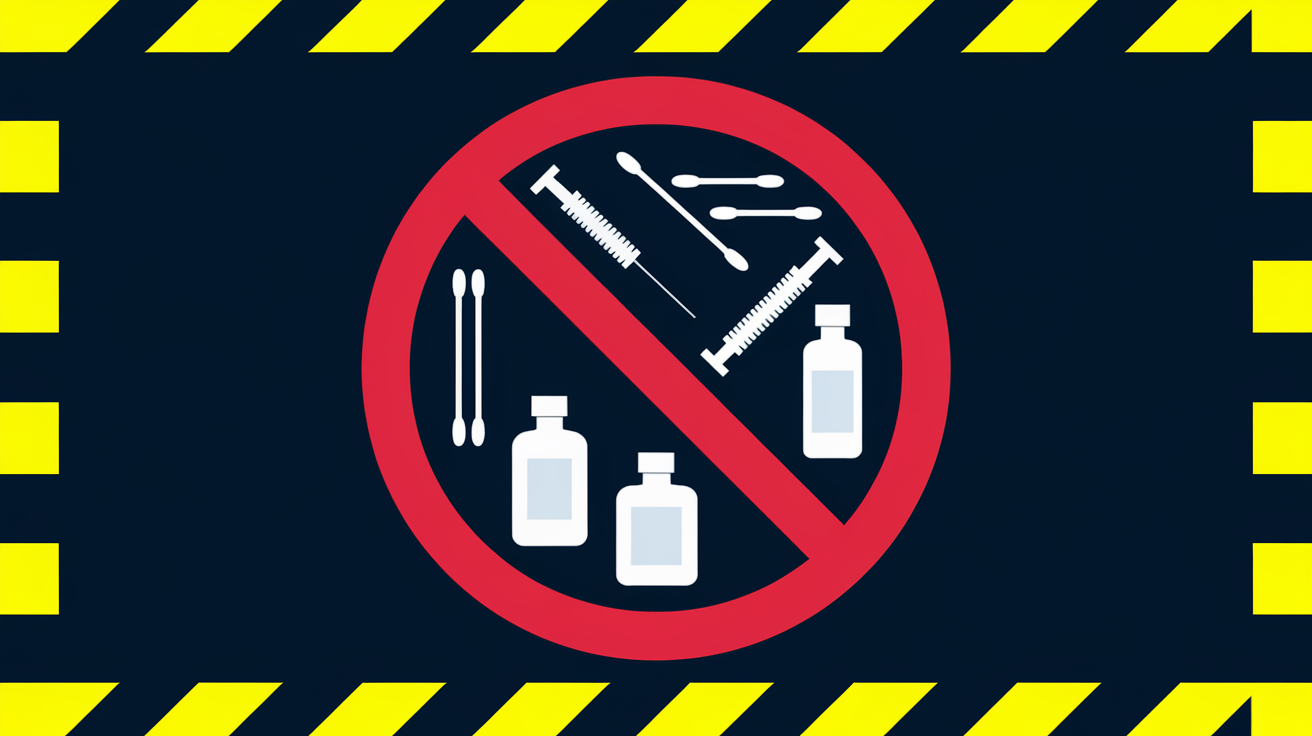
First and most important, never use cotton swabs, Q-Tips, or any rigid instrument inside your dog’s ear canal. These tools are too long, too narrow, and too easy to push too deep. They pack debris and wax past the natural curve of the canal instead of removing it, and they can scrape or puncture delicate tissue, especially if your dog moves suddenly. The same rule applies to syringes, which can create dangerous pressure against the eardrum.
Don’t use alcohol, hydrogen peroxide, or any human antiseptic wipes. Alcohol stings and dries out the ear canal skin, making it more prone to cracking and infection. Hydrogen peroxide foams and looks impressive, but it also damages healthy cells, irritates inflamed tissue, and can slow healing if there’s already an infection brewing. Both can make a mild problem worse and cause real pain.
Here are the core safety rules in a short checklist:
Never insert anything deeper than ½ inch or one knuckle into the ear canal.
Avoid water directly inside the canal. It doesn’t dry well and creates a breeding ground for bacteria and yeast.
Skip home cleaning entirely if the ear’s visibly inflamed, painful, bleeding, or smells rotten. Those are signs of infection that need veterinary treatment, not a DIY rinse.
Don’t clean ears right after known toxin exposure or trauma (a bite, a scratch, or a sharp object stuck in the ear). See a vet immediately.
Never force it. If your dog’s frantic, biting, or in obvious distress, stop and consult your veterinarian about sedation or professional cleaning.
Don’t use homemade vinegar or oil solutions on red, swollen, or painful ears. They’ll sting and worsen inflammation.
When you follow these boundaries, home ear cleaning is low-risk and genuinely helpful. When you ignore them, you can turn simple wax buildup into a painful infection or an injured eardrum.
How to Hold and Calm Your Dog for Effective At-Home Ear Cleaning
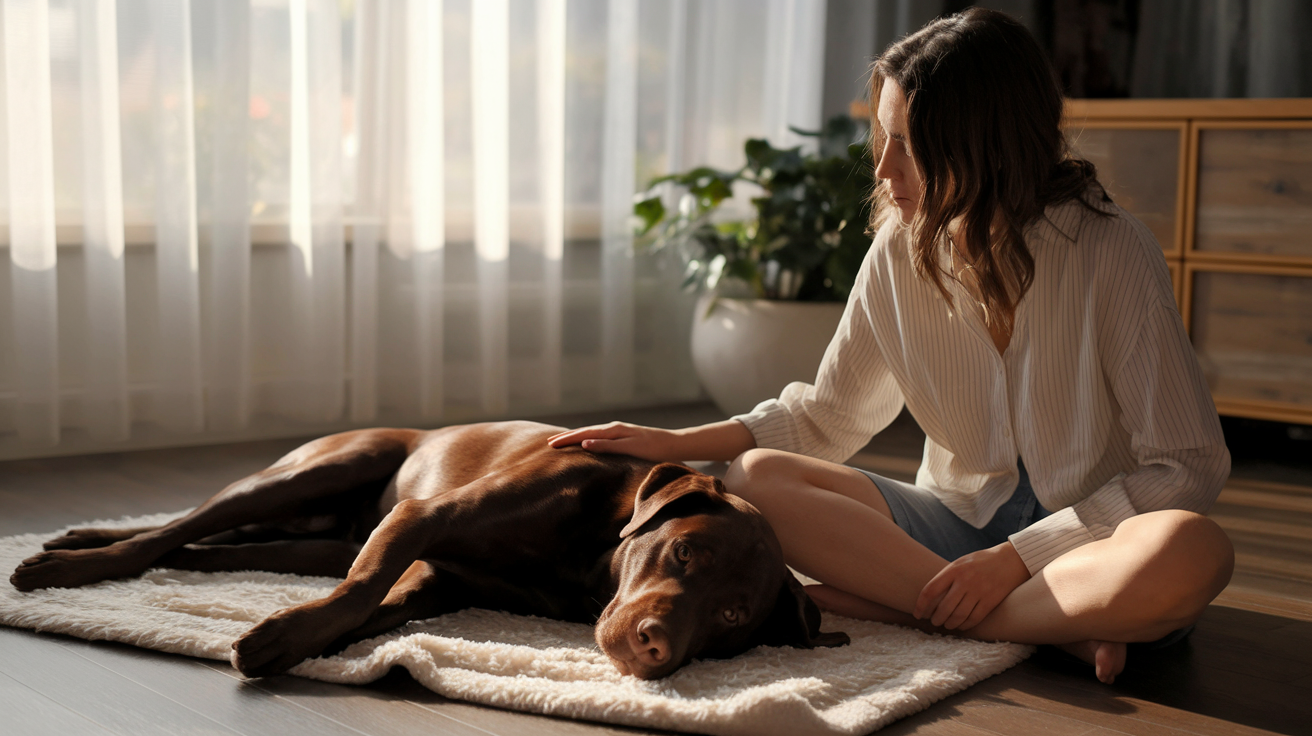
Pick a moment when your dog’s already relaxed. Tired from a walk, drowsy before bedtime, or calm after a meal. A stressed or hyper dog will squirm, making the process harder and less safe for both of you. Sit on the floor or on a low chair so your dog doesn’t feel trapped or towered over, and keep your voice quiet and steady.
Have your dog lie on their side on a soft towel or blanket. Gently rest one hand on their shoulder or neck to provide light, calm pressure, not to pin them down. If your dog’s nervous or fidgety, ask a family member to sit nearby and offer slow, gentle strokes or hold a favorite chew toy as a distraction. Avoid tight restraint. It ramps up fear and makes future cleanings harder. The goal is calm cooperation, not force.
After each step of the cleaning process, pause for a few seconds. Let your dog shake if they want to, take a breath, and offer a small treat or scratch behind the other ear (the clean one). If your dog stays relaxed, you can finish both ears in one session. If they start to tense up or pull away, stop after one ear, give them a break, and finish the second ear an hour later or the next day. Short, positive sessions teach your dog that ear cleaning isn’t scary, and over time they’ll tolerate it more easily, especially if you pair it with something they love, like a spoonful of plain yogurt or a few minutes of gentle play right after.
Adjusting Ear Cleaning for Puppy, Senior, Floppy-Eared, and Upright-Eared Dogs
Puppies need shorter, gentler sessions because they’re still learning to trust handling. Use the same supplies and steps, but keep each session under five minutes and focus more on calm touching and rewards than on deep cleaning. A puppy with healthy ears may only need a light wipe of the outer canal once a week while they get used to the routine. Pair every ear touch with a small treat so they build a positive association early.
Senior dogs often have arthritis or stiff joints, so lying on their side for several minutes can be uncomfortable. Prop their head gently on a folded towel, work quickly and calmly, and let them shift position if they need to. Older dogs are also more likely to have chronic ear issues from a lifetime of allergies or infections, so check with your vet about how often to clean and whether a medicated solution’s needed instead of a general rinse.
| Dog Type | Special Consideration |
|---|---|
| Floppy-eared breeds (Cocker Spaniels, Basset Hounds, Beagles) | Ear flaps trap moisture and block airflow, creating a warm environment for bacteria and yeast. Check ears more often, especially after baths or swimming, and dry thoroughly after every cleaning. |
| Upright-eared breeds (German Shepherds, Huskies) | Better natural ventilation means fewer infections for many dogs, but dirt and debris still accumulate. Clean as needed based on wax buildup and activity level. |
| Large-breed dogs (Great Danes, Mastiffs, Retrievers) | Bigger ear canals hold more cleaning solution, so expect a bigger, wetter head shake. Keep a large towel ready and stand to the side when you release the ear flap. |
| Dogs that swim frequently | Water trapped in the canal after swimming raises infection risk. Rinse and dry ears gently after every swim session, not just once a week. |
Breeds with hair growing inside the ear canal, like Poodles and Schnauzers, may need that hair trimmed or plucked regularly by a groomer or veterinarian to prevent wax and debris from getting trapped. Ask your vet whether your dog’s ear hair should be managed and how often. Some dogs tolerate plucking well, others do better with careful trimming, and a few are fine leaving the hair alone as long as cleaning stays consistent.
Recommended Frequency for Cleaning Dog Ears at Home
For most dogs with healthy ears and no history of chronic infections, a gentle cleaning once a month during bath time is enough to prevent buildup and keep the canal fresh. This routine lets you catch small problems early before they turn into infections. Check the ears every week by lifting the flap, taking a quick look, and giving a gentle sniff, but only clean when you actually see wax accumulating or notice a mild odor.
Dogs prone to ear issues, long-eared breeds, allergy-prone dogs, or those that swim regularly, often need more frequent care. For these dogs, cleaning one to three times per week can help reduce infections and keep moisture and debris from settling in the canal. If your dog’s been diagnosed with chronic ear inflammation by a veterinarian, follow the cleaning schedule your vet recommends. It may be as often as every other day during flare-ups and weekly during calm periods.
| Dog Type | Suggested Frequency |
|---|---|
| Healthy ears, low-risk breeds | Once a month, or as needed when wax is visible |
| Floppy-eared, allergy-prone, or frequent swimmers | One to three times per week |
| Dogs with chronic ear inflammation (under vet care) | Follow your veterinarian’s specific schedule, often two to three times per week or daily during active treatment |
If you’re ever uncertain whether your dog’s ears need cleaning or if what you’re seeing is the start of an infection, skip the home cleaning and schedule a quick vet check instead. Cleaning an infected ear at home can push bacteria deeper, delay proper treatment, and cause unnecessary pain.
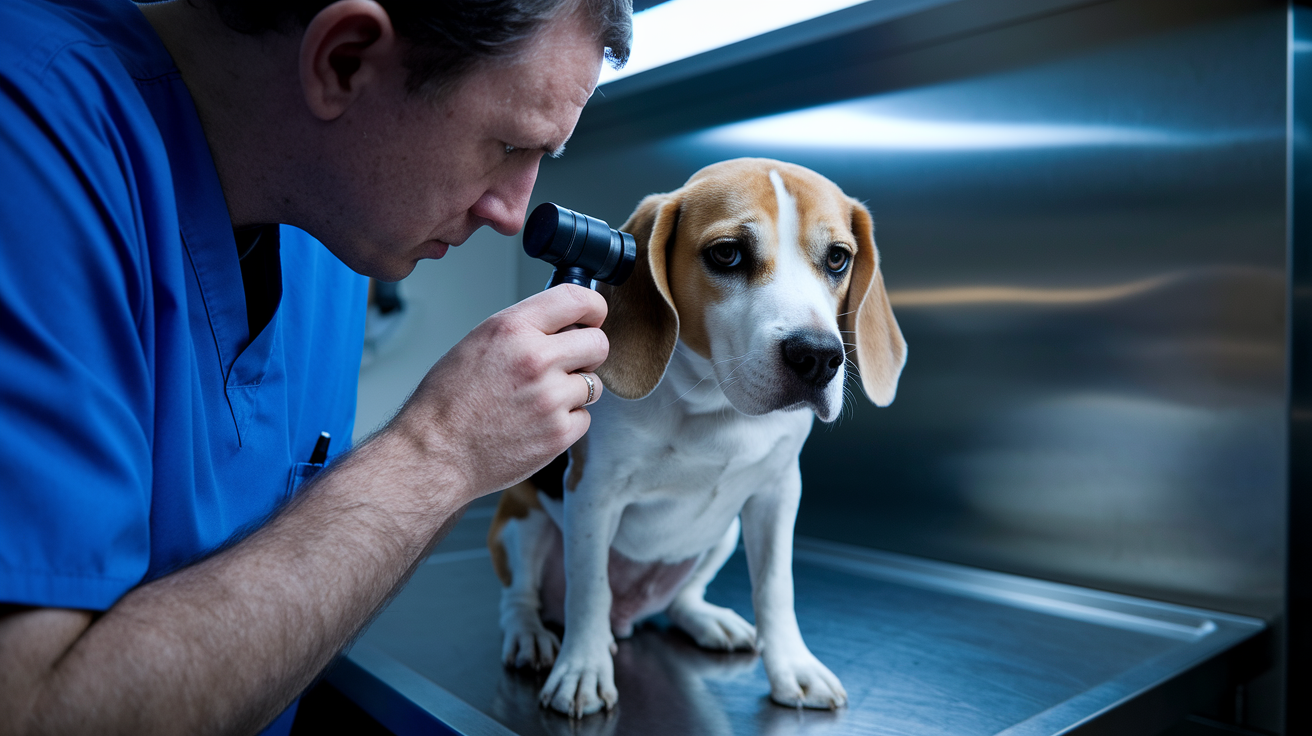
When to See a Veterinarian Instead of Cleaning Dog Ears at Home

Some ear problems look minor at first but need professional diagnosis and medication, not a home rinse. If your dog’s ear is red, swollen, or hot to the touch, that’s inflammation, and cleaning it with any solution, even a gentle one, can make the pain worse and drive bacteria or yeast deeper into the tissue. The same’s true if you see thick, creamy, or discolored discharge (white, yellow, or green), blood on your cotton ball, or if the ear smells truly foul, like rotting garbage or strong fermented yeast.
Intense head shaking, constant scratching that leaves the ear raw, or a dog that yelps or snaps when you touch the ear are all signs of significant pain. Pain means something’s wrong beyond surface wax. There may be an infection, a foreign object lodged in the canal, ear mites, or even a ruptured eardrum. These conditions require veterinary examination, often including an otoscope check to see deep into the canal, and targeted treatment with prescription ear drops, oral antibiotics, antifungals, or anti-inflammatory medication.
Ear mites are more common in puppies and outdoor dogs. They cause intense itching, dark crumbly debris that looks like coffee grounds, and sometimes a strong odor. You can’t wash out ear mites with cleaning solution. They need a prescription miticide. Yeast infections create a sweet, musty, or bread-like smell and brownish-yellow waxy discharge that keeps coming back even after you clean. Bacterial infections often smell sour or rotten and produce thick pus. Both yeast and bacterial infections require lab tests to confirm the type and the right medication to clear them. Guessing and cleaning at home won’t fix the underlying problem and can allow the infection to spread deeper or become chronic.
Final Words
Prep, squeeze a pet-safe ear cleaner into the canal, gently massage the base for 30 seconds, let your dog shake, then wipe the reachable areas with a cotton ball around your finger.
Keep cleaning shallow, no deeper than one knuckle or about ½ inch. Stop and call your vet right away for redness, swelling, pus, blood, severe pain, or a very strong odor.
Practicing these steps and watching for red flags makes how to clean dog ears at home something you can do safely and confidently. Small routines help keep your dog comfortable.
FAQ
Q: What is the best home remedy to clean a dog’s ears?
A: The best home remedy to clean a dog’s ears is a diluted apple cider vinegar rinse (1 part vinegar to 2 parts water) or warmed almond oil to soften wax. Don’t use if ears look inflamed—call your vet.
Q: How do you get brown gunk out of a dog’s ear?
A: To get brown gunk out of a dog’s ear, use a pet-safe ear cleanser, fill the canal, massage the ear base for 30 seconds, let them shake, then wipe reachable debris with cotton wrapped around your pinky.
Q: What do vets recommend to clean dogs’ ears?
A: Vets recommend a veterinarian-approved ear cleanser, cotton or gauze, gentle massage, allowing a head shake, wiping accessible areas with a finger-wrapped cotton, and never inserting deeper than one knuckle (½ inch).
Q: What can I use instead of dog ear cleaner?
A: Instead of commercial dog ear cleaner, you can use a diluted apple cider vinegar solution (1:2) or a few drops of warmed almond oil to loosen wax; never use if ears are red, painful, or strongly odorous—see your vet.